Let’s introduce the next component required in my HomeLab – Azure AD Connect!
Probably every person which is reading my blog heard about Azure AD connect. It can be used to synchronize identities from on-premise environment to Azure AD environment and for the beginning I will be using it for that case.
The First will be to download an Azure AD connect. I will use a dedicated VM for that case.
After the installation, you will see information about EULA. In the next step, you need to decide if you will be using a custom installation setup or express settings. For many small companies, there is no need to customize the installation setup. But if you want to check the below settings, like the Service Account (which was created for example by another service on your organization) go ahead to customize your setup.
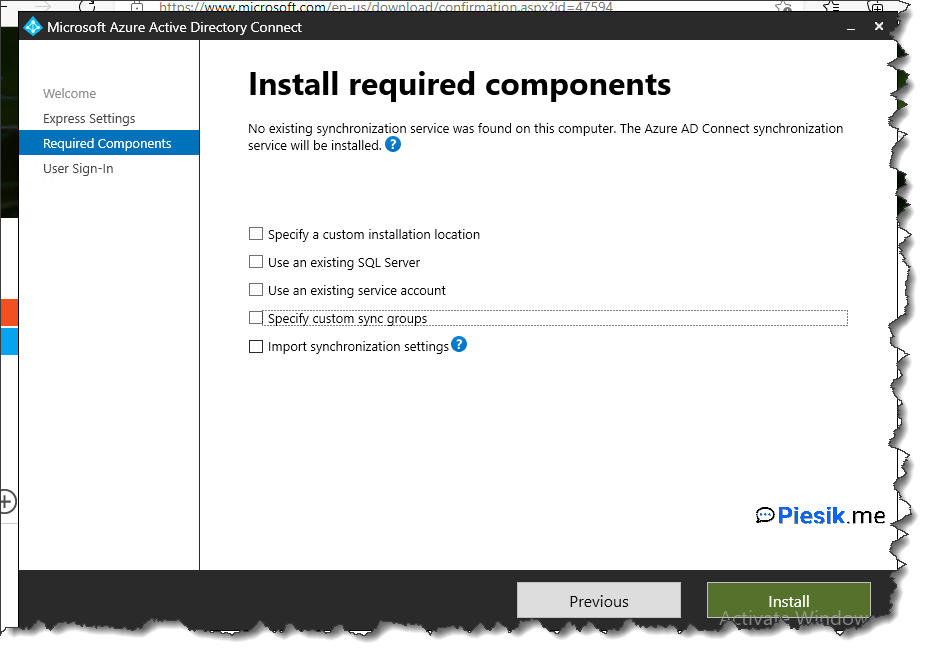
I will be installing using custom settings.
Before installation prepare an additional account, which will be used for Synchronization on the AAD. This account should have a Hybrid Identity Administrator role. Preferable not to use Global Administrator role.
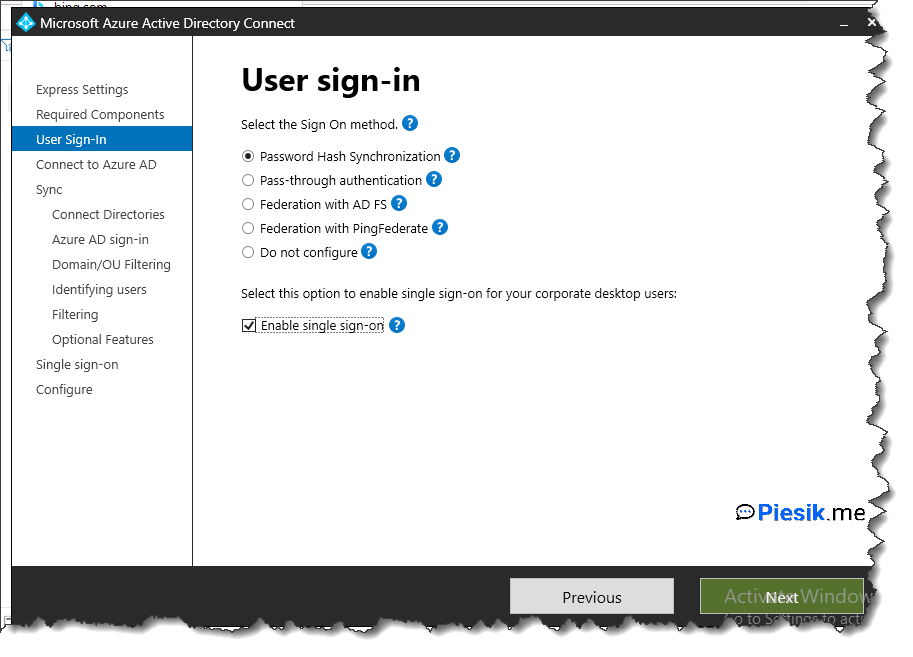
In the first step, you need to select what type of Single Sign you will be using. In my case, I will use Password Hash Synchronization and use SSO from domain-joined devices.
The next step is providing a username and password for connection with Azure AD. Use a dedicated account or… Global Administrator which is not recommended of course.
The next step is to select an Active Directory forest and authenticate it as an account with Enterprise Admin permissions.
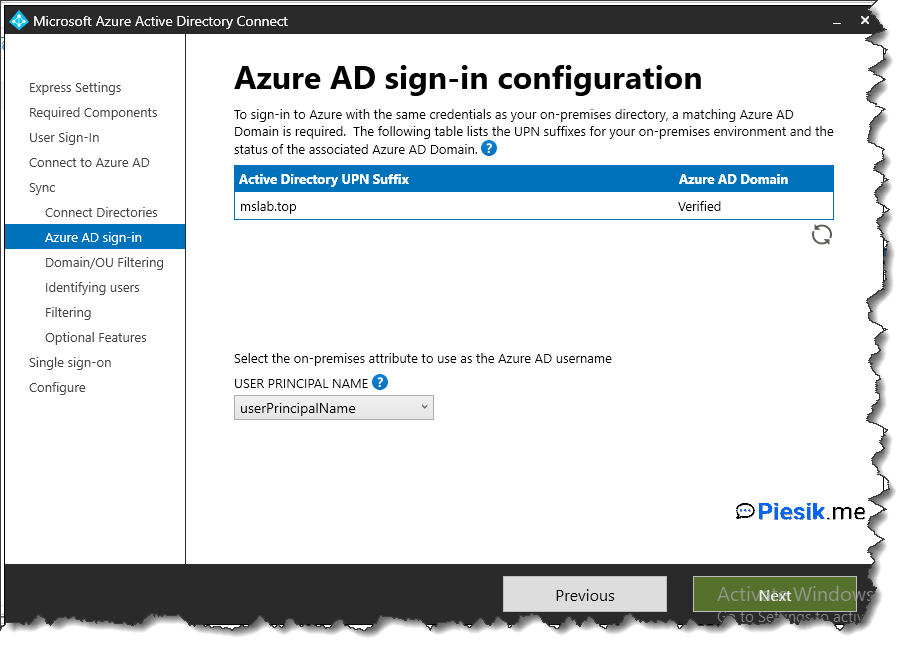
Next, you’re configuring the Azure AD sign-in configuration. On the below screen you can see that domain which I’m using on the on-premise environment it’s the same which I will be using on the cloud.
If you’re using another domain in the cloud, you need to add a domain from the cloud to the Active Directory Domain and Trust as an Alternate UPN suffix.
On the next configuration screen, you can select which OU’s you want to synchronize. For example, I selected only my primary OU where I’m storing all of the objects. Not needed to synchronize default accounts, groups, etc.

After that, you’re selecting how do you want to identity your users. For many organizations, default settings are enough.
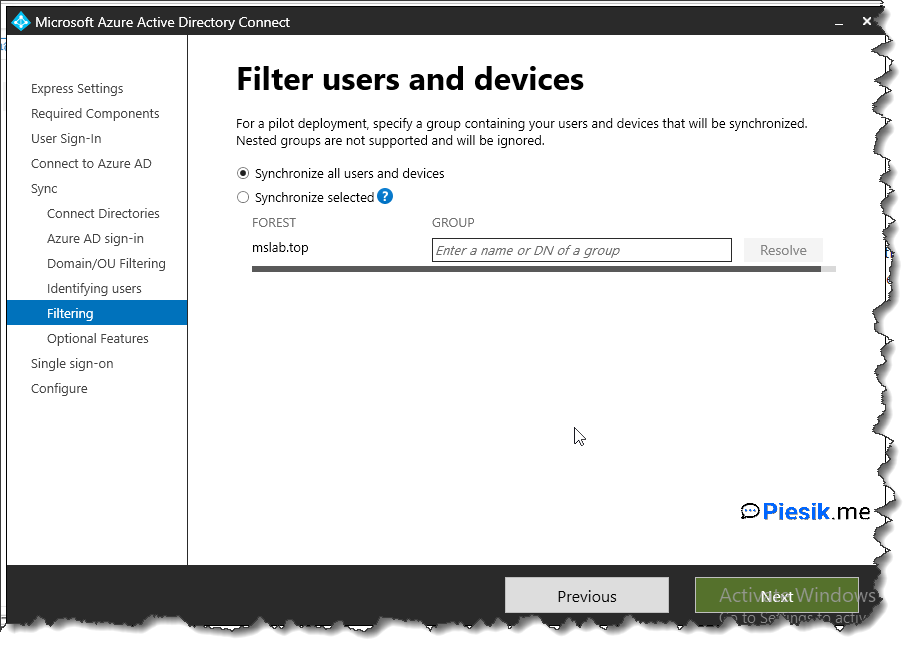
If you want to filter users/devices, you can do that in the next step.
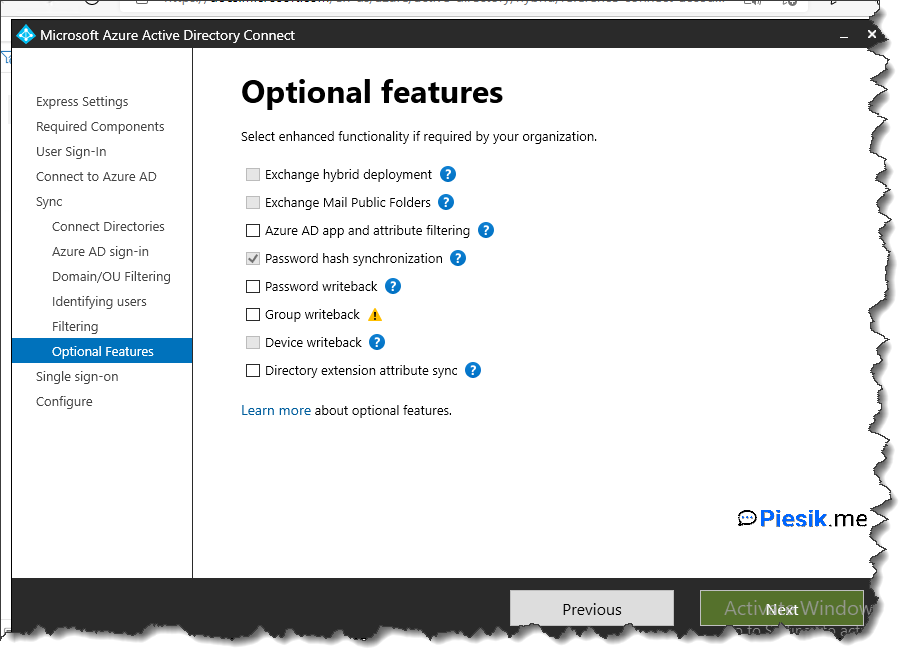
The next screen is about configuring additional options, like group writeback, password write-back, etc. For now, I will be not using that options. I just need to synchronize my groups and users.
In the last step, you can select if you want to start synchronization after installation or enable the stagging mode.
After a couple of minutes, AAD connect will be installed and you see that kind of information:
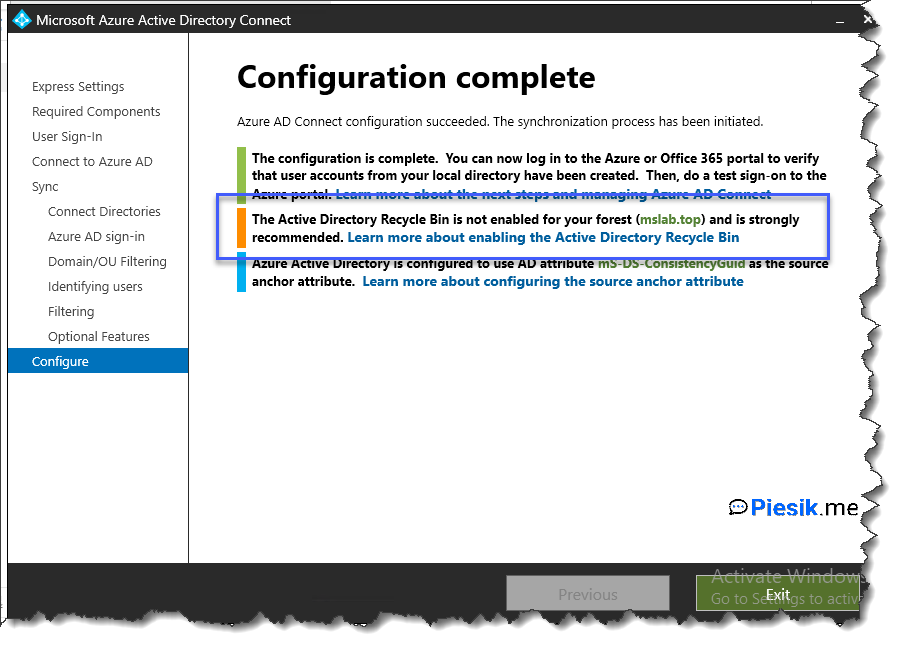
Please remember about turning on Recycle bin by using this command:
Enable-ADOptionalFeature 'Recycle Bin Feature' -Scope ForestOrConfigurationSet -Target YourDomainName
And basically, it’s everything.
Synchronization was started and on the AAD you can see your groups and users from local AD.
I will be extending the usage of AAD Connect in the next articles.
