

Last time I had possibility to work with Microsoft Surface devices. I was working with Surface Pro 7+ and Surface Pro X. I learned a lot a lot about those devices and… Today I want to share one thing which I learned about them.
On this article you will read what is SEMM and how to configure it for the end-user. And of course – for the Administrators. Also, we will create some configuration packages and I will show you how to configure new settings for the Surface devices.
SEMM – what is it?
As Microsoft Documentation says…
Microsoft Surface Enterprise Management Mode (SEMM) is a feature of Surface devices with Surface Unified Extensible Firmware Interface (UEFI). You can use SEMM to:
- Secure and manage firmware settings in your organization.
- Prepare UEFI settings configurations and install them on a Surface device.
SEMM also uses a certificate to protect the configuration from unauthorized tampering or removal.
https://learn.microsoft.com/en-us/surface/surface-enterprise-management-mode
In simple words – using SEMM you’re able to disable for example – Rear Camera on the End-User device and user will be not able to turn on back this camera. You can configure multiple settings via SEMM and on this article – I will show you how.
Getting started and requirements
There are couple reequipments what you need to meet.
First requirement that you need to have compatible device from Surface family. For now the list of compatible devices are:
- Surface Pro 9 (commercial SKUs only)
- Surface Pro 9 with 5G (commercial SKUs only)
- Surface Pro 8 (commercial SKUs only)
- Surface Pro 7+ (commercial SKUs only)
- Surface Pro 4 and later (all SKUs)
- Surface Pro X (all SKUs)
- Surface Laptop SE (all SKUs)
- Surface Laptop Studio (commercial SKUs only)
- Surface Hub 2S
- Surface Laptop 5 (commercial SKUs only)
- Surface Laptop 4 (commercial SKUs only)
- Surface Laptop 3 (Intel processors only)
- Surface Laptop Go
- Surface Laptop Go 2 (commercial SKUs only)
- Surface Book (all generations)
- Surface Go, Surface Go 2
- Surface Go 3 (commercial SKUs only)
- Surface Studio (all SKUs)
Next – you need to select which method of enrolling devices to SEMM you will choose.
First method is via Microsoft Surface UEFI Configurator.
Second is about Microsoft Surface UEFI Manager.
On both methods – you will need to have a valid certificate file which you will be using to signing the package.
Certificate – first requirement
First please remember about….
YOU NEED TO HAVE A COPY OF THIS CERTIFICATE ON THE SAFE PLACE!!
Why? Because when the SEMM package will be applied on the end-user device and when you lost the certificate which was used for signing the package you will be NOT ABLE TO REMOVE THE SEMM CONFIGURATION. Remember about this.
After generating a certificate, copy it to the safe place. And don’t touch this file….
So if this is clear – we can start generating Self-Signed certificate.
According to the documentation – https://learn.microsoft.com/en-us/surface/surface-enterprise-management-mode#self-signed-certificate – you can generate certificate using below script:
$pw = ConvertTo-SecureString "12345678" -AsPlainText -Force #here you need to provide a password to the certificate. Use some different password

$TestUefiV2 = New-SelfSignedCertificate `
  -Subject "CN=Surface Demo Kit, O=Contoso Corporation, C=US" #here you need to provide proper organization structure
  -Type SSLServerAuthentication `
  -HashAlgorithm sha256 `
  -KeyAlgorithm RSA `
  -KeyLength 2048 `
  -KeyUsage KeyEncipherment `
  -KeyUsageProperty All `
  -Provider "Microsoft Enhanced RSA and AES Cryptographic Provider" `
  -NotAfter (Get-Date).AddYears(25) `
  -TextExtension @("2.5.29.37={text}1.2.840.113549.1.1.1") `
  -KeyExportPolicy Exportable

$TestUefiV2 | Export-PfxCertificate -Password $pw -FilePath "Demo Certificate\TempOwner.pfx" #here you need to provide a path where certificate will be exported
So certificate is now exported and can be used for signing the package. Remember about the copy!.
First method… UEFI Configurator
As I said earlier – there are two method of usage the SEMM. First method is UEFI Configurator. It’s more simple to use – because have a GUI which can be used for the creation of package.
To download this application visit the Surface Tools for IT page and select to download file named SurfaceUEFI_Manager_v2.102.139.0_x64.msi or newer if will be exist.
Install it with Administrator permissions and.. run it. First you need to select what you want to manage:
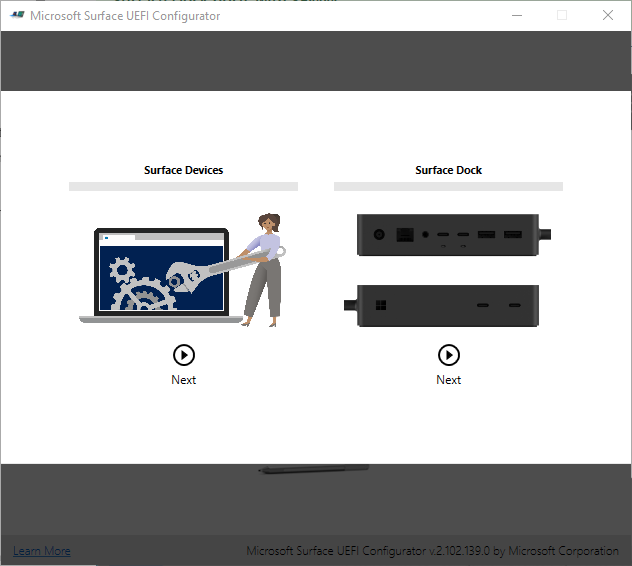
I will of course focus today on the Surface Devices. Next you need to select what do you want to do:

- Create a configuration Package
- Create a Reset Package
- Or maybe initiate a Recovery Request
I will focus on the first option – create a configuration package.
The next option is how do you want to distribute the package:
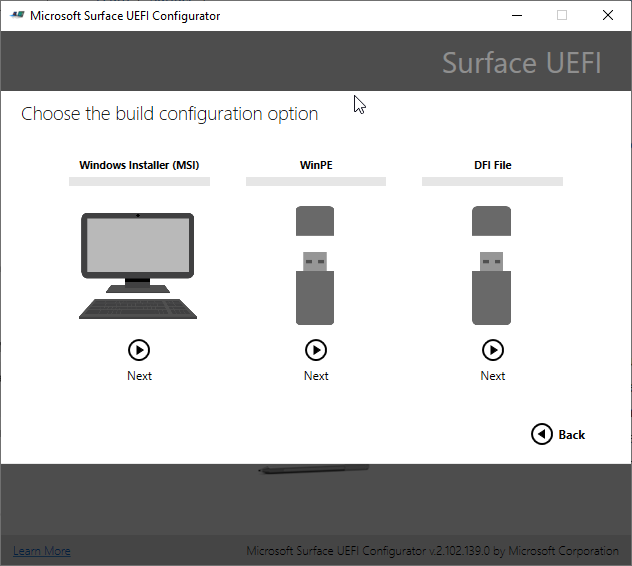
I will select the Windows Installer – MSI. DFI file can be used to distribute this package via Pendrve and manual install on the every device.
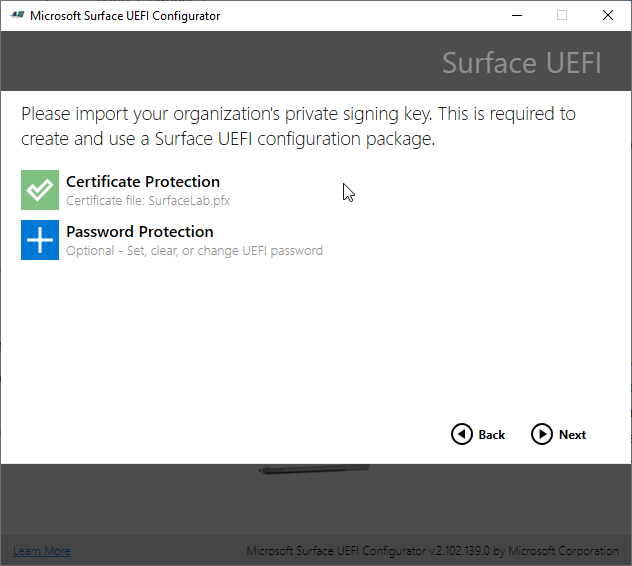
After that – you need to select certificate which will be used for signing the package and provide a password to this certificate. REMEMBER about the backup for this certificate! Of course – you can also set, clear or change the UEFI password if you want this step is optional.
Next step is selecting which device you want to target with that package.. List is very long.
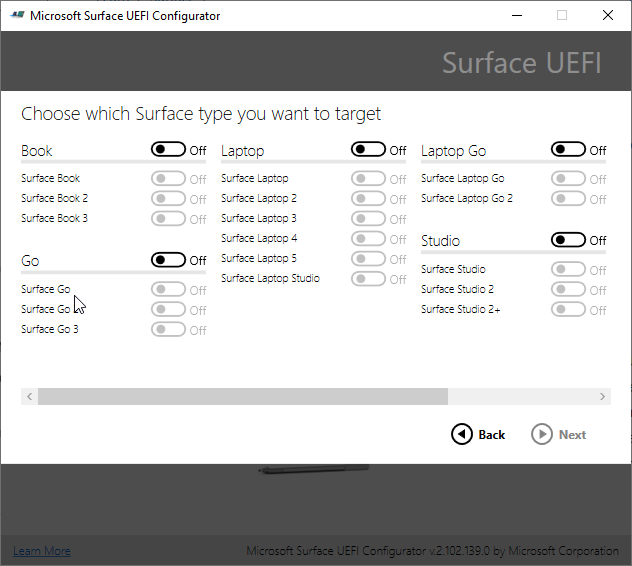
I will select only Surface Pro 7+. When proper device will be selected… it is the most important step – which device you want to configure:
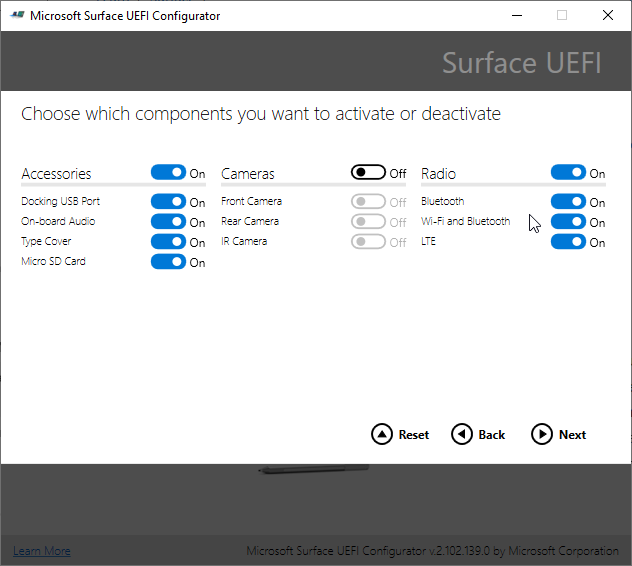
For example, I decided to turn off the Cameras.
You can also hide some pages on the UEFI or change the boot settings or configure the different settings also:

On the last step – you need to save prepared package on some location and move it to the end-user device.
And on the end – we have something interesting…

Those two characters are required to type after the reboot to apply the package on the end-user device.
If you don’t type those characters – SEMM will be not applied. So save it to safe place.
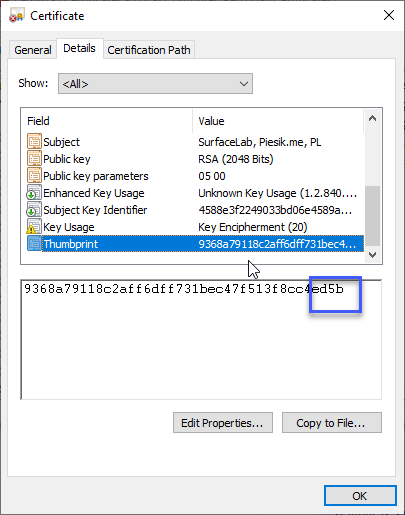
If you forget those characters – you can always check certificate thumbprint from details of certificate:
Now you can install this package on the end-user device.
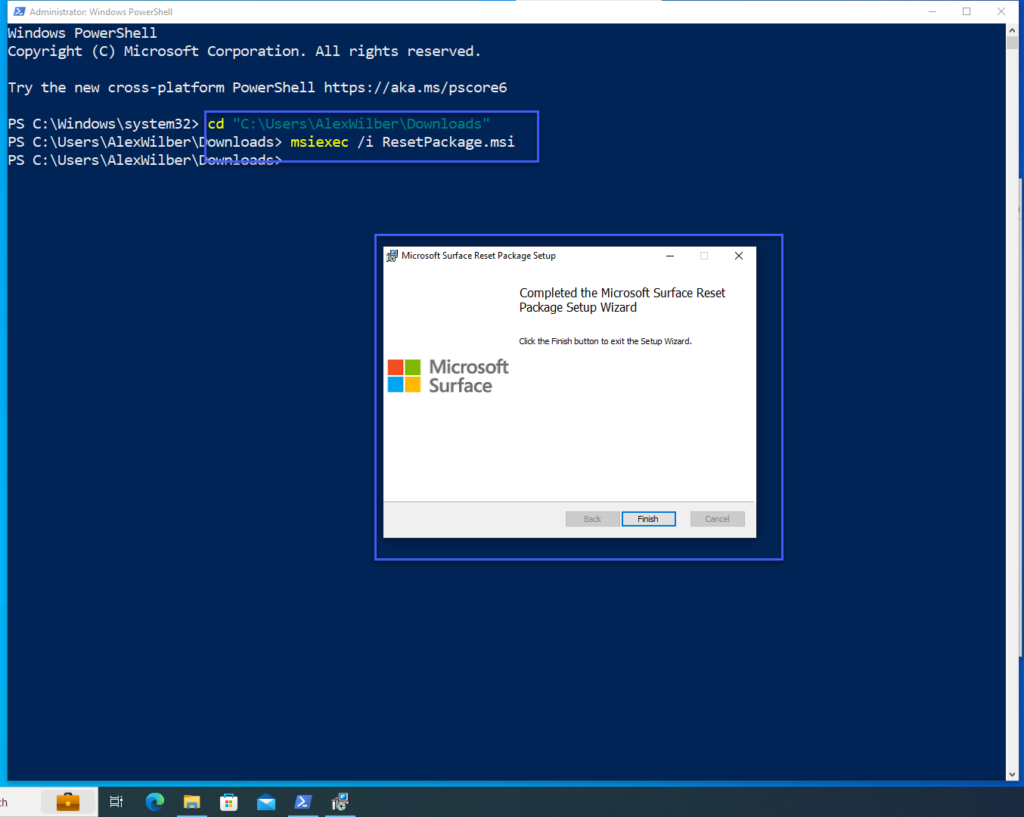
Open PowerShell as Administrator and execute command where file is located. In my case – Downloads for the local User:
msiexec /i MSIPackageName.msiInstall the package and…
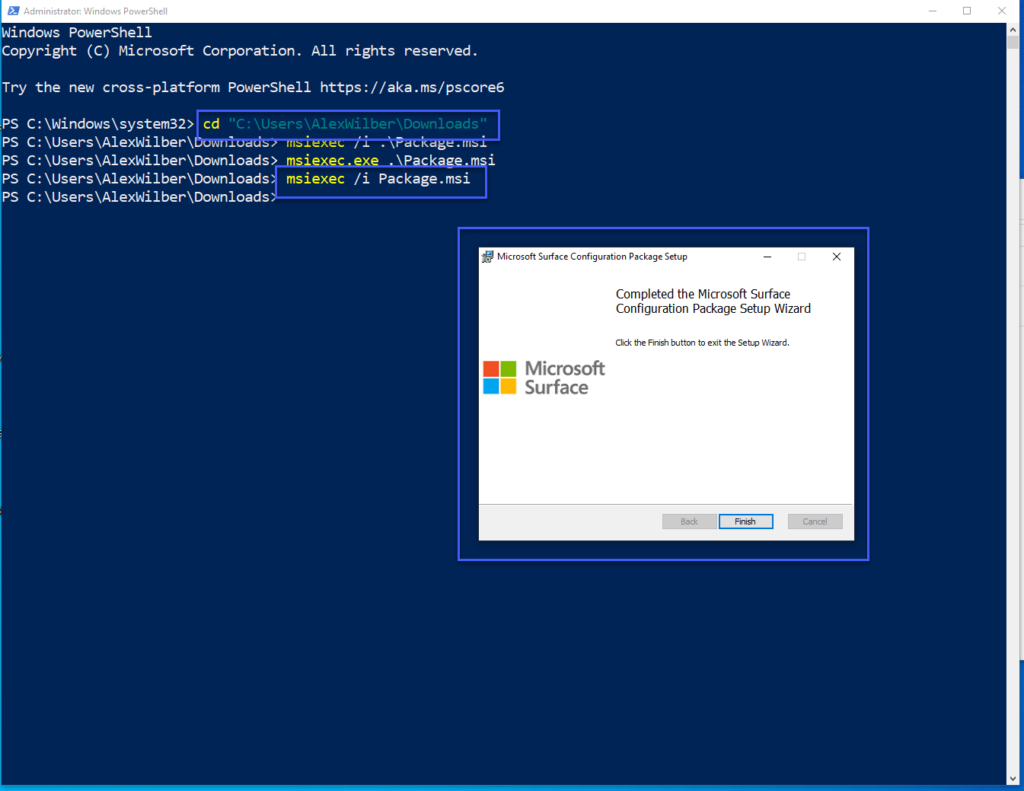
Reboot the device. On the first reboot you will see the information that you need to provide two characters from the certificate thumbprint.
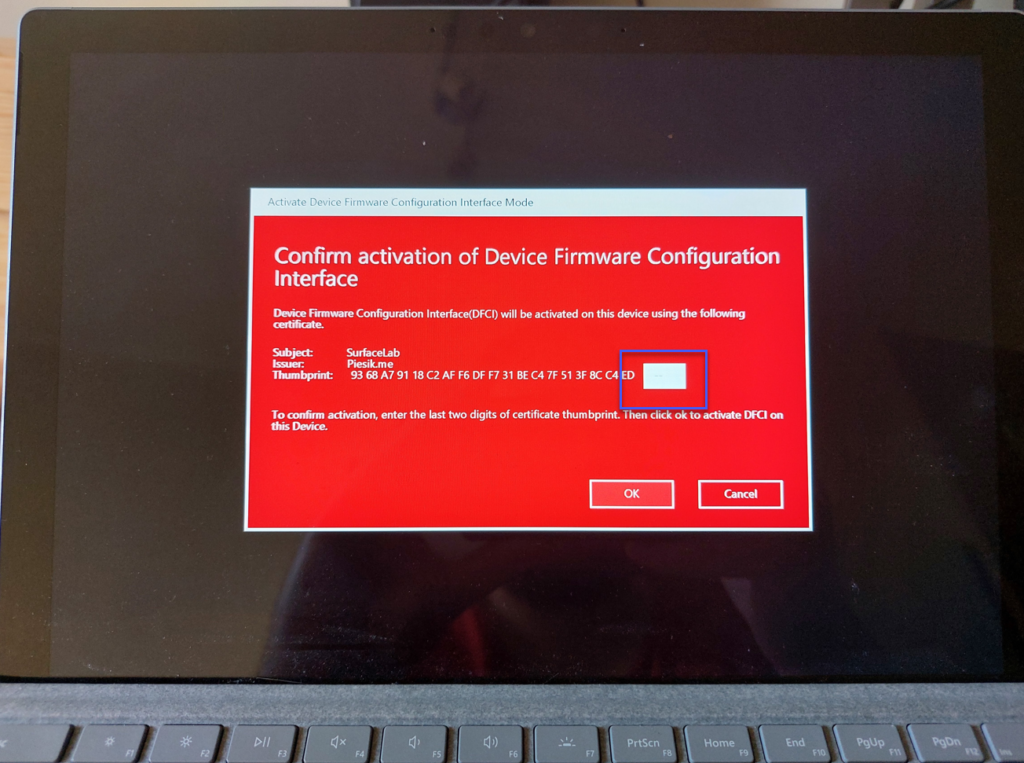
When you type those two characters, configuration package will be applied.
On the next reboot you can run the UEFI and check settings:
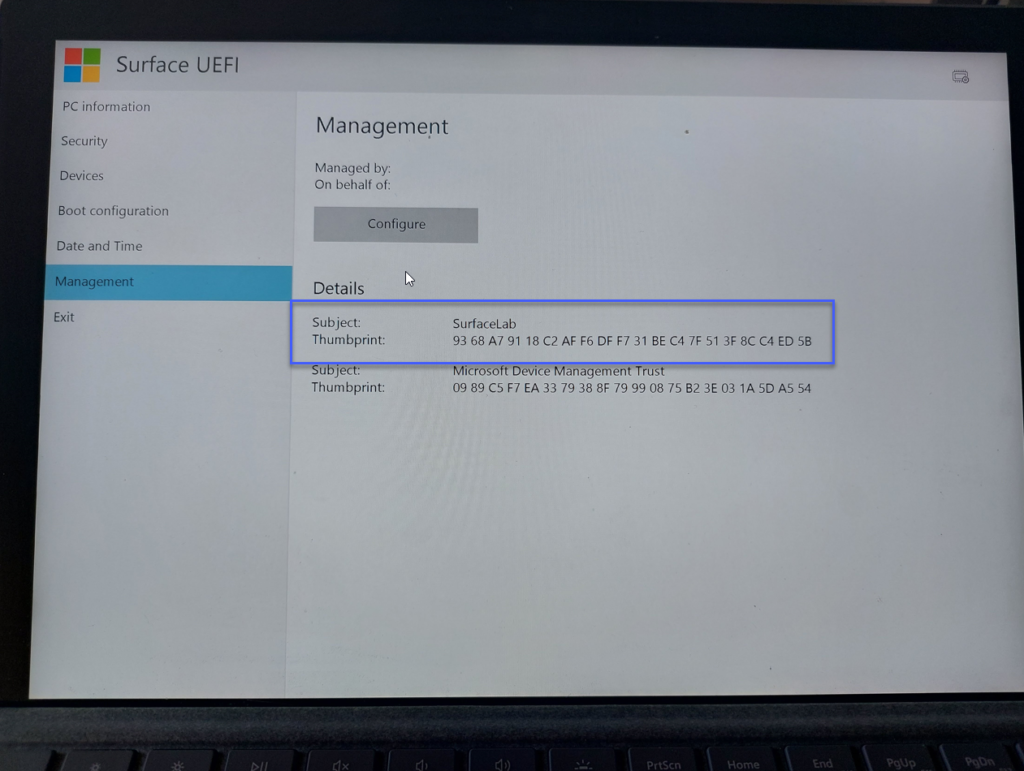
And we see that configuration for Devices are changed:

So we configured everything what we want…
BUT
What to do next?
For example, we don’t want to manage those Surface devices anymore. We should remove this configuration package from end-user device. How to do this? There are two possible methods to do that.
First is…
Create a reset package
You can create a reset package using this same way as you created configuration package. Open the Surface Configurator and select Reset Package instead Configuration Package.
Insert Serial Number from device:
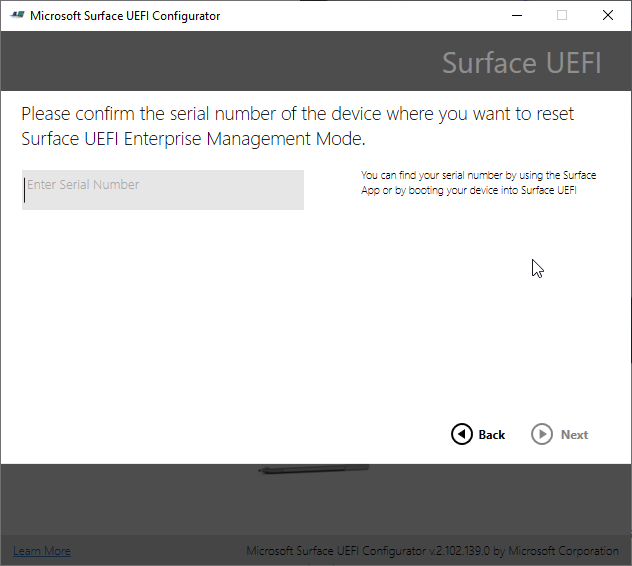
And save package to proper location. Now run this package on the user device as previous with Administrator rights…
And after the reboot – configuration will be removed.
But what to do if you cannot use Reset package? Use the option for the Recovery Request.
Recovery request
This method should be used if you don’t have possibility to boot to Windows to install the Recovery Package manually.
Boot Surface to the UEFI, go to the Management option, select Configure button and use Management Recovery option to start the process. Continue the process and click again on the Get Started button.
Continue with process:
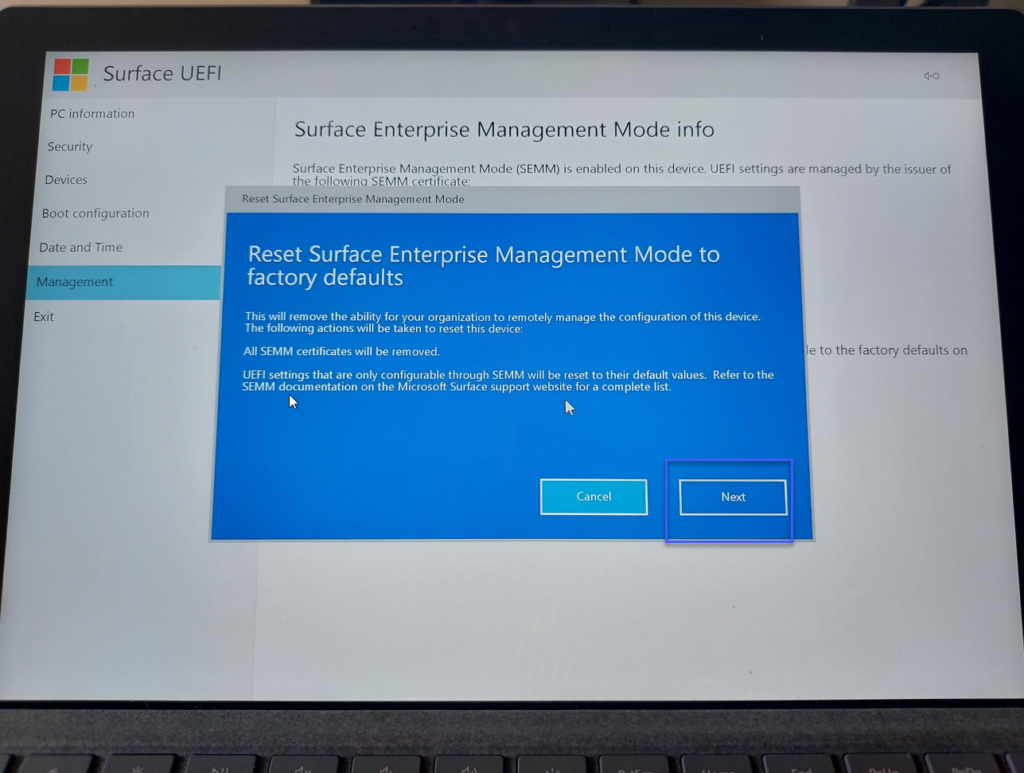
Confirm that you want to reset specific configuration:
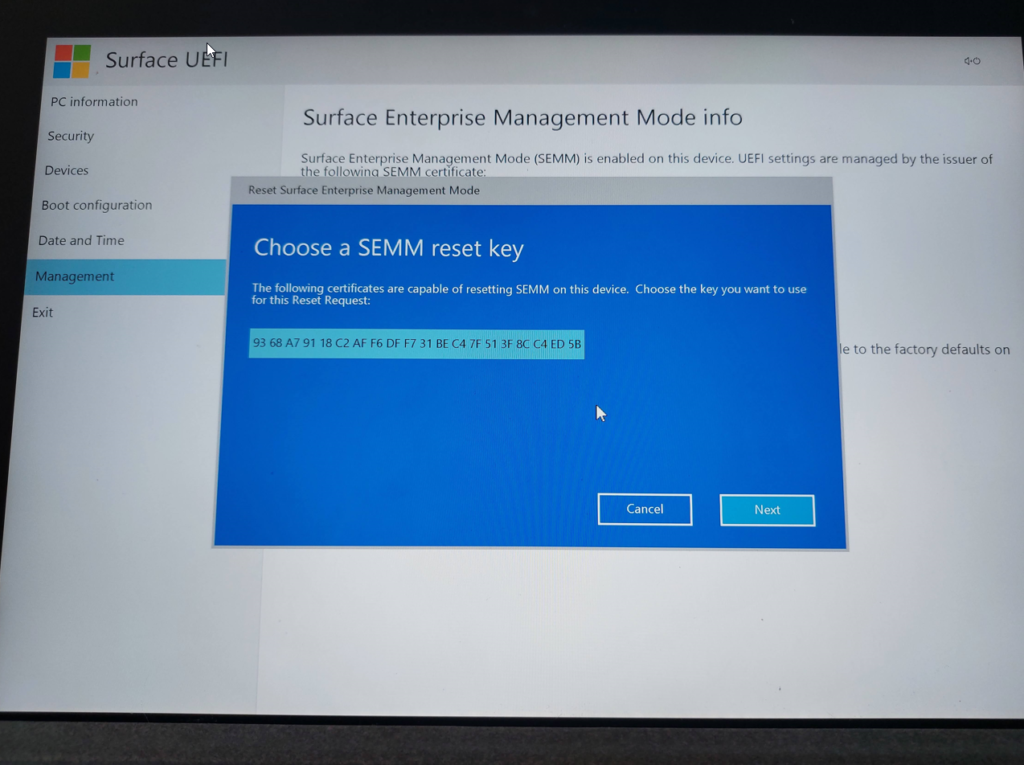
And select how you want to enter the SEMM reset verification code:
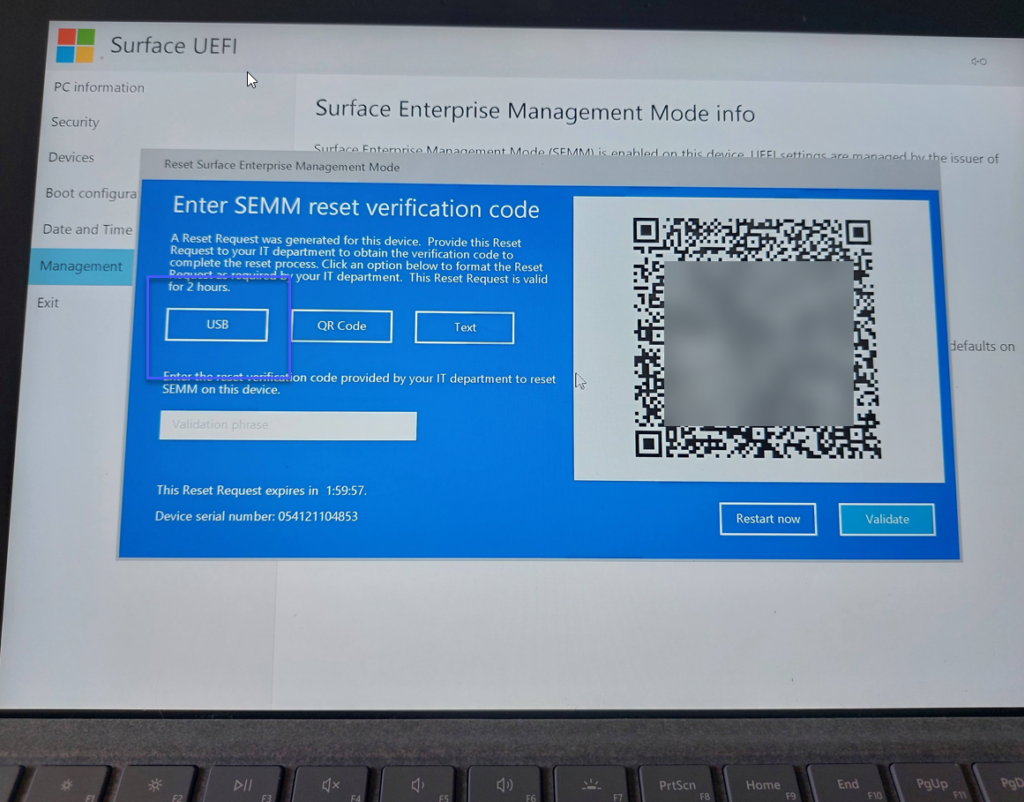
On my case, I will use USB. Select proper Pendrive, click save and file will be saved to the Pendrive.
Now connect Pendrive to the station where you have UEFI Configurator installed and select Recovery Request.
Select certificate > import the code from the USB:
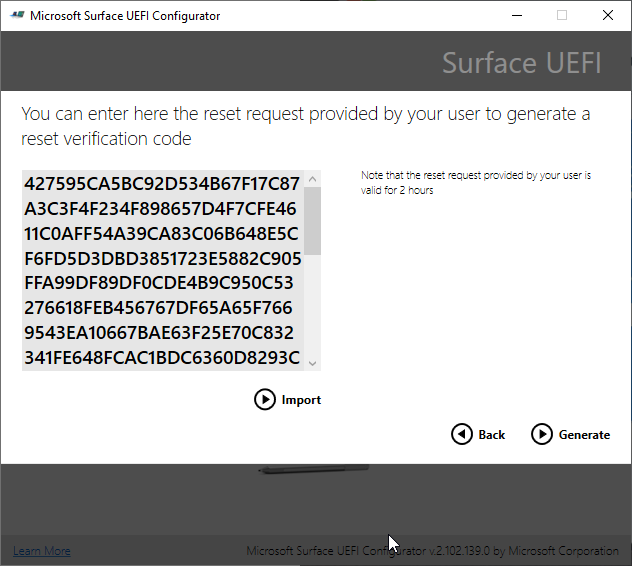
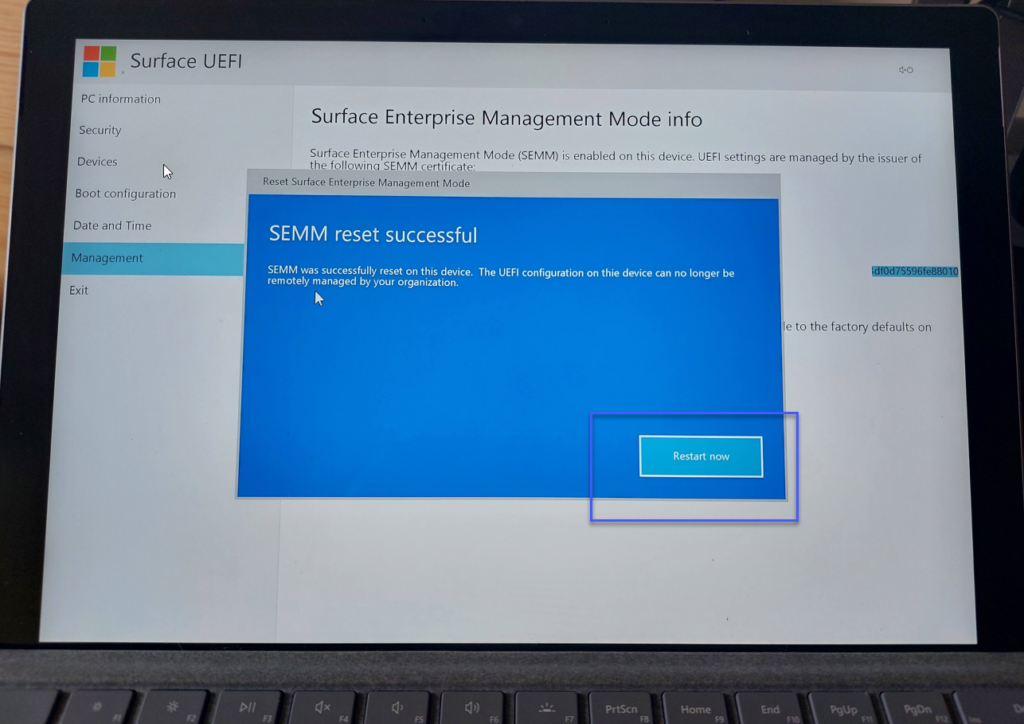
Click Generate and type generated Code on the End-user Device.
On the end, you will see information that SEMM was cleaned.
And it’s everything.
On this post I show you how to configure SEMM via SEMM Configurator. This process is not automated and require a lot of job from the Administrators.
So what to do to have more automated way?
Use UEFI Manager!
But if you want to use that method, read another blog post: https://piesik.me/2023/06/16/manage-your-surface-devices-via-semm-part-two/
See you on the next post! 🙂
